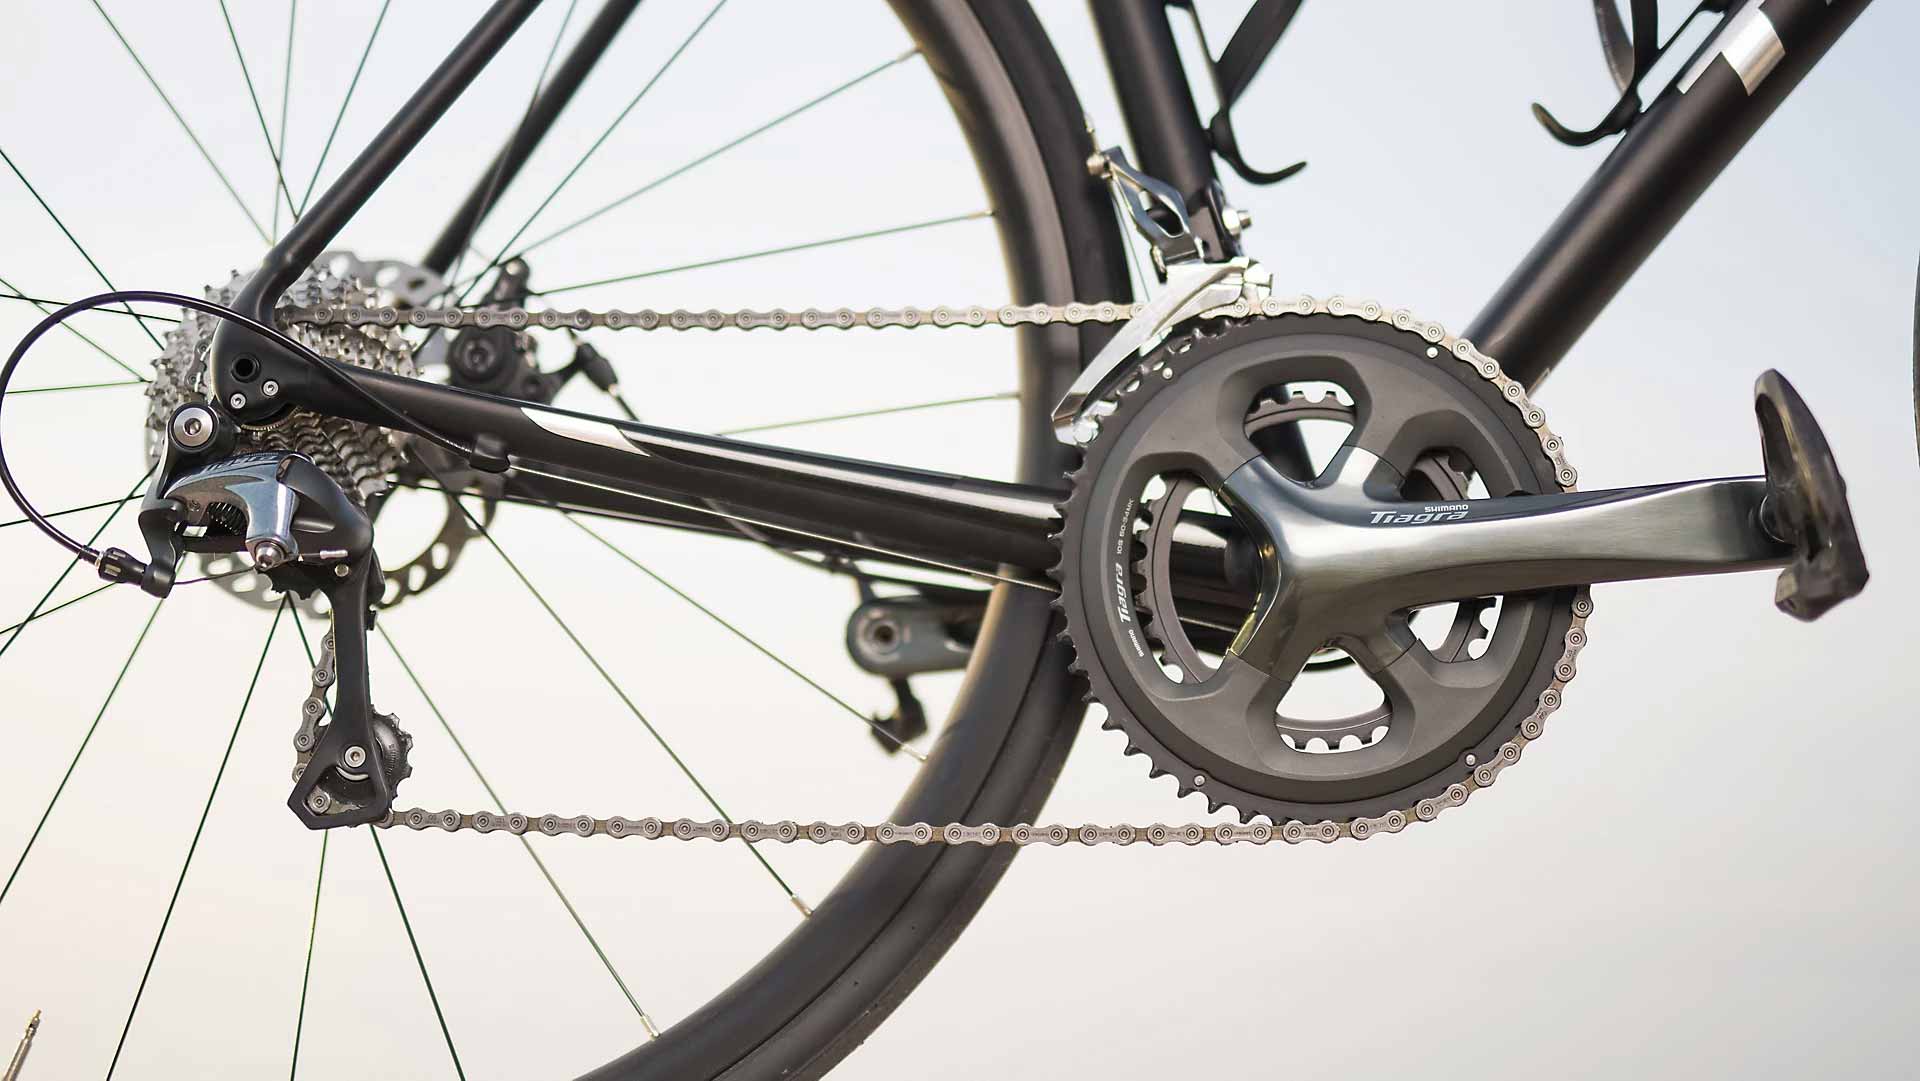
Thoroughly clean the bicycle chain of your road bike
Properly maintaining your bicycle chain is one of the best ways to save on replacing your parts. Because your bicycle chain and sprockets are thoroughly clean, they wear out a lot less quickly than when they are dirty and covered in sand. In this blog we explain step by step how you can get the chain of your road bike like new again. Please note: the cleaning frequencies and tips described are specific to the road bike. Although gravel bike and mountain bike chains are cleaned in the same way, they should be cleaned more often and more thoroughly.
First of all, how often should you clean the bicycle chain? We recommend that you thoroughly clean your chain at least every 10 rides. More often is not necessarily necessary, unless, for example, you have cycled through the rain or if there is suddenly a lot of dirt on it. You can recognize a dirty chain by the amount of black junk that sticks to it. A clean chain is almost silver in color and a dirty chain is often black. A good tip: can you no longer read the letters on the side of the necklace? Then it's time for a thorough cleaning.
Before we start cleaning the chain, we have described some requirements. In our opinion, it is definitely worth getting these tools at home. You save money in the long term because maintenance is prevented.
In our instruction we remove the chain completely. We use a missing link, a kind of link that makes it easy to put on and take off the chain. We recommend that you also install a missing link on your chain so that you can easily and quickly remove your bicycle chain (often under 5 euros). It is advisable to remove your chain completely during cleaning because you can then clean all parts better. Don't have the right tools at home to remove the chain? Then skip step 1 and read the text in italics for extra tips on how to clean your bicycle chain without removing it.
- Chain tool (in the case of a shear pin) or a missing-link pliers (in the case of a missing link).
- Decreaser / degreaser (preferably biodegradable)
- Empty bottle with wide cap
- Cloths that can get very dirty
- Spray nozzle (for example from an old bottle of all-purpose cleaner) (some degreasers are like in a spray bottle)
- Water

Step 1: Removing the bicycle chain
Tip before you remove the bicycle chain: take a good look at how the chain fits around the sprockets and derailleur wheels, but if necessary take a photo of it, so that you will know how to put the chain back on later.
Chain tool
Use the chain tool to push out the shear pin (note: this takes quite a bit of force). After this you can easily remove the chain from the drivetrain.
Missing link
Use the special pliers to pull the missing link together. Then the chain will come off easily.

Step 2: Cleaning the bicycle chain itself
Put the necklace in the bottle and fill it halfway with decreaser. Tightly screw the cap on and shake well for a few minutes. Then leave the bottle standing and turn it occasionally while cleaning the gears (and an extra shake is always allowed, of course).
Tip : some people, for example, use benzene to degrease their bicycle chain. We recommend that you mainly use degreasers that are specially made for bicycle chains. These degreasers are slightly less aggressive and therefore less likely to affect the metal of the chain. Especially in the case of slightly older chains, it is not recommended to use gasoline because it can affect the metal and this can lead to a break in your chain, for example.
When you do leave the chain on
Spray the chain well with degreaser as you spin it. Make sure there is plenty of degreaser on the entire chain.

Step 3: Cleaning the Cassette
Now that the chain is degreasing in its degreaser bath, we continue with the next step. Remove the rear wheel from the frame for easy access. Use the nozzle to distribute Decreser evenly over the cassette. Turn the cassette slowly so that the decreaser can spread well. In the meantime, turn and shake the bottle with the chain again.
After you have briefly soaked the decreaser (max 1 minute), the cleaning can begin. Grab a cloth (a brush is also allowed but not essential) and work systematically from the small gear to the large gear. Make sure you run the cloth well along the gears so that the sand and other dirt comes off. You may also place the cloth between the gears. By holding the wheel firmly with your feet, for example, you can clean the cassette nicely all around. It is quite a lot of work to brush off all the dirt, but if you do this regularly it will become less and less work (less dirt also ensures that less dirt can stick).
Step 4: The Big, Front Sprockets
After we have cleaned the cassette well, we give the bottle a good shake. In addition, we will also continue with the front sprockets. Also spray it generously with decreaser and let it soak in for a while. Then grab a cloth and wipe off all the dirt. It is only clean when you can clearly see the silver color of the gears again. The inner gears are sometimes a bit difficult to reach. You can fold your cleaning cloth in half a few times and try to place it in between, this will make it a bit easier.
Step 5: Rinse
Now that everything is clean, we are unfortunately not done yet. To make the drivetrain run smoothly again, it is important that all degreaser is properly removed. First of all, we take the necklace out of the bottle. If there are still residues on this, you can remove it with a cloth or a brush. In the case of a biological degreaser, throw the remainder through the toilet or the like. If your degreaser is not biodegradable, you must dispose of it. Then rinse the chain well with water, until you feel that there is no degreaser left on it (let the chain dry afterwards). Now also rinse your cassette and sprockets with water. Use a bucket of water or a garden hose for this. As long as all degreaser is properly removed.
Step 6: Replacing the bicycle chain
Chain tool
Take a new shear pin, the old one is no longer usable. Lay the chain correctly and push the shear pin into position. Then take a pair of pliers and break off the remaining piece.
Missing link
Put the chain back in its original shape and push the missing link together. Then make sure the missing link is on the top of the chain and just in front of the front sprockets. Now squeeze your front brake firmly and kick your pedals. This will cause the missing link to fix itself.
Step 7: Lubricating the bicycle chain
There are different types of grease / oil / lube to lubricate your chain. In the end, it doesn't matter much, but if we have to give advice, we advise you to use wet-lube. This is slightly more fluid than regular lube but will attract less dirt during a dirty ride.
Place the lube on the sprockets and turn the pedal about 6 times (this is +- 3 whole circles for the chain). This should be about enough to last for the next three or four rides. After lubricating, run another cloth along the sides and bottom of the chain so that there is no unnecessary oil here. This only attracts dirt and has no function. There should really only be oil on the links, the rest is not functional and only attracts dirt. Be sure not to use too much oil! This is really not necessary and attracts dirt, which causes your chain to wear out faster. Six times around with your pedal is more than enough. Would you like to read more about how to properly lubricate your bicycle chain? Then read our blog about lubricating your bicycle chain .

Step 8: Go cycling!
Only clean the chain when it is dirty! Once every 10 times is just a guideline. This may sometimes be necessary more often and sometimes less often. What helps well is to go with a brush along your cassette and bicycle chain after cycling. This removes the sand, which prevents wear. Lubricate your chain once every five rides and check it occasionally to make sure it's not too dry.











Leave a comment
This site is protected by hCaptcha and the hCaptcha Privacy Policy and Terms of Service apply.